
When I first started dating my husband I thought the fact that he was Greek was cool although it wasn’t something that I thought would be a big part of who he is since he was born in Canada. It wasn’t until I met his family, including both sets of grandparents, his parents and three younger brothers that I realized how prominent being Greek was in his life. Now having known my Greek family for more than twenty years, the pride of who they are and their culture is very clear.
When we were dating, my husband’s Grandmother’s asked Nick (my husband) to ask me if I would help cook for the church fair, this was a big deal… He was very nervous and he did not want me to mess it up. I tried not to be insulted seeing as I was in culinary school at the time and I figured I could hold my own but anyway… I went to Nick’s parent’s house and his wonderful, sweet little Grandmas Helen and Angela met me with hugs and kisses, they tied a floral apron around my waist and told me I was too skinny (love them). We made spanakopita and Greek cookies for hours, it was so much fun and it continues to be one of my favorite memories with them. Since then I take pride in cooking like a Greek, I’ve cooked for Greek Canadians, Greek Greeks and Greek Church Greeks and so far they tell me I’m doing well.
So I can confidently tell you that this is infact Authentic Greek Pita, even though it’s made by a non Greek such as myself.
Authentic Greek Pita
1 1/2 cups Warm water (110F)
1 tsp Instant dry yeast (check expiry)
565g All purpose flour
30g Honey
1 1/2 tsp Kosher salt
1 1/2 tbsp olive oil
Place the water, honey and yeast in a bowl and let it sit at room temp for 5 to 10 minutes while it begins to foam. In the meantime place dry ingredients in the bowl if a stand mixer, stir to combine. Add oil to the liquid mixture and add the liquid mixture to the dry ingredients. Mix on second speed using the hook attachment for 10 minutes. The dough should appear very soft but not sticking to the sides of the bowl. If you have sticking, add 1 tbsp of flour and mix in, repeat if necessary. If the dough appears dry, add 1 tbsp of warm water and mix in, repeat if necessary. Weather can play a role in dough being too wet or dry and sometimes adjustments are needed. Cover the noel with a damp towel or plastic wrap and let rise for 1 – 1.5 hours.
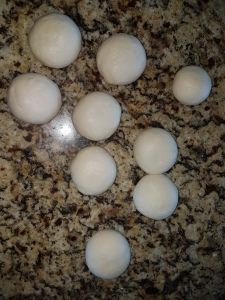
Portion 4oz balls of dough and let sit covered with a damp towel to rest.
Dust counter and the top of tge first ball with flour and roll flat until ir is .25″ thick.

Place on a parchment lined baking sheet and brush with oil. Repeat for remaining balls of dough. Don’t worry

Heat grill at the highest setting being sure to clean the grill with a brush very well. Once hot, place some of the pitas on the hit grill and close the lid, it’s important to maintain a high heat so keep the lid closed as much as possible. Wait approx. 2 minutes and lift the lid, you should see multiple bubbles firming on the dough. If not, close the lid and wait, if the bubbles are visible, flip the dough and cook on the other side with the lid closed for an additional 2 minutes.

Place on a clean baking sheet and repeat. Make these very close to when they’ll be eaten, guests live to watch this process and children will literally stand to the side waiting for a warm Pita. Keep them covered with a dry tea towel to keep them warm. Serve with everything but especially souvlaki with tzatziki. Enjoy!

